Getting Started
Installation
The easiest way to get started is by bringing up Nivio in Docker:
export NIVIO_BASE_URL=http://localhost:8080
docker run -it --rm -e NIVIO_BASE_URL -p 8080:8080 dedica/nivio:latest
Take a look at http://localhost:8080/
A friendly reminder on the application starting screen tells you that there are no landscapes loaded, yet. To do so, follow the instructions below.
Creating the first landscape
The simplest possible landscape definition consists of:
- an identifier, used e.g. when updating the landscape
- a name, that is shown in the UI
- at least 1 item (things get weird if there are no items at all)
In YAML, it looks like this:
1 2 3 4 5 | identifier: tutorial name: Nivio Tutorial items: - identifier: item-1 name: My first item |
Create the file tutorial.yaml and upload (POST) this file using curl:
curl -X POST -H "Content-Type: application/yaml" --data-binary @tutorial.yaml ${NIVIO_BASE_URL}/api/landscape
Take another look at http://localhost:8080/
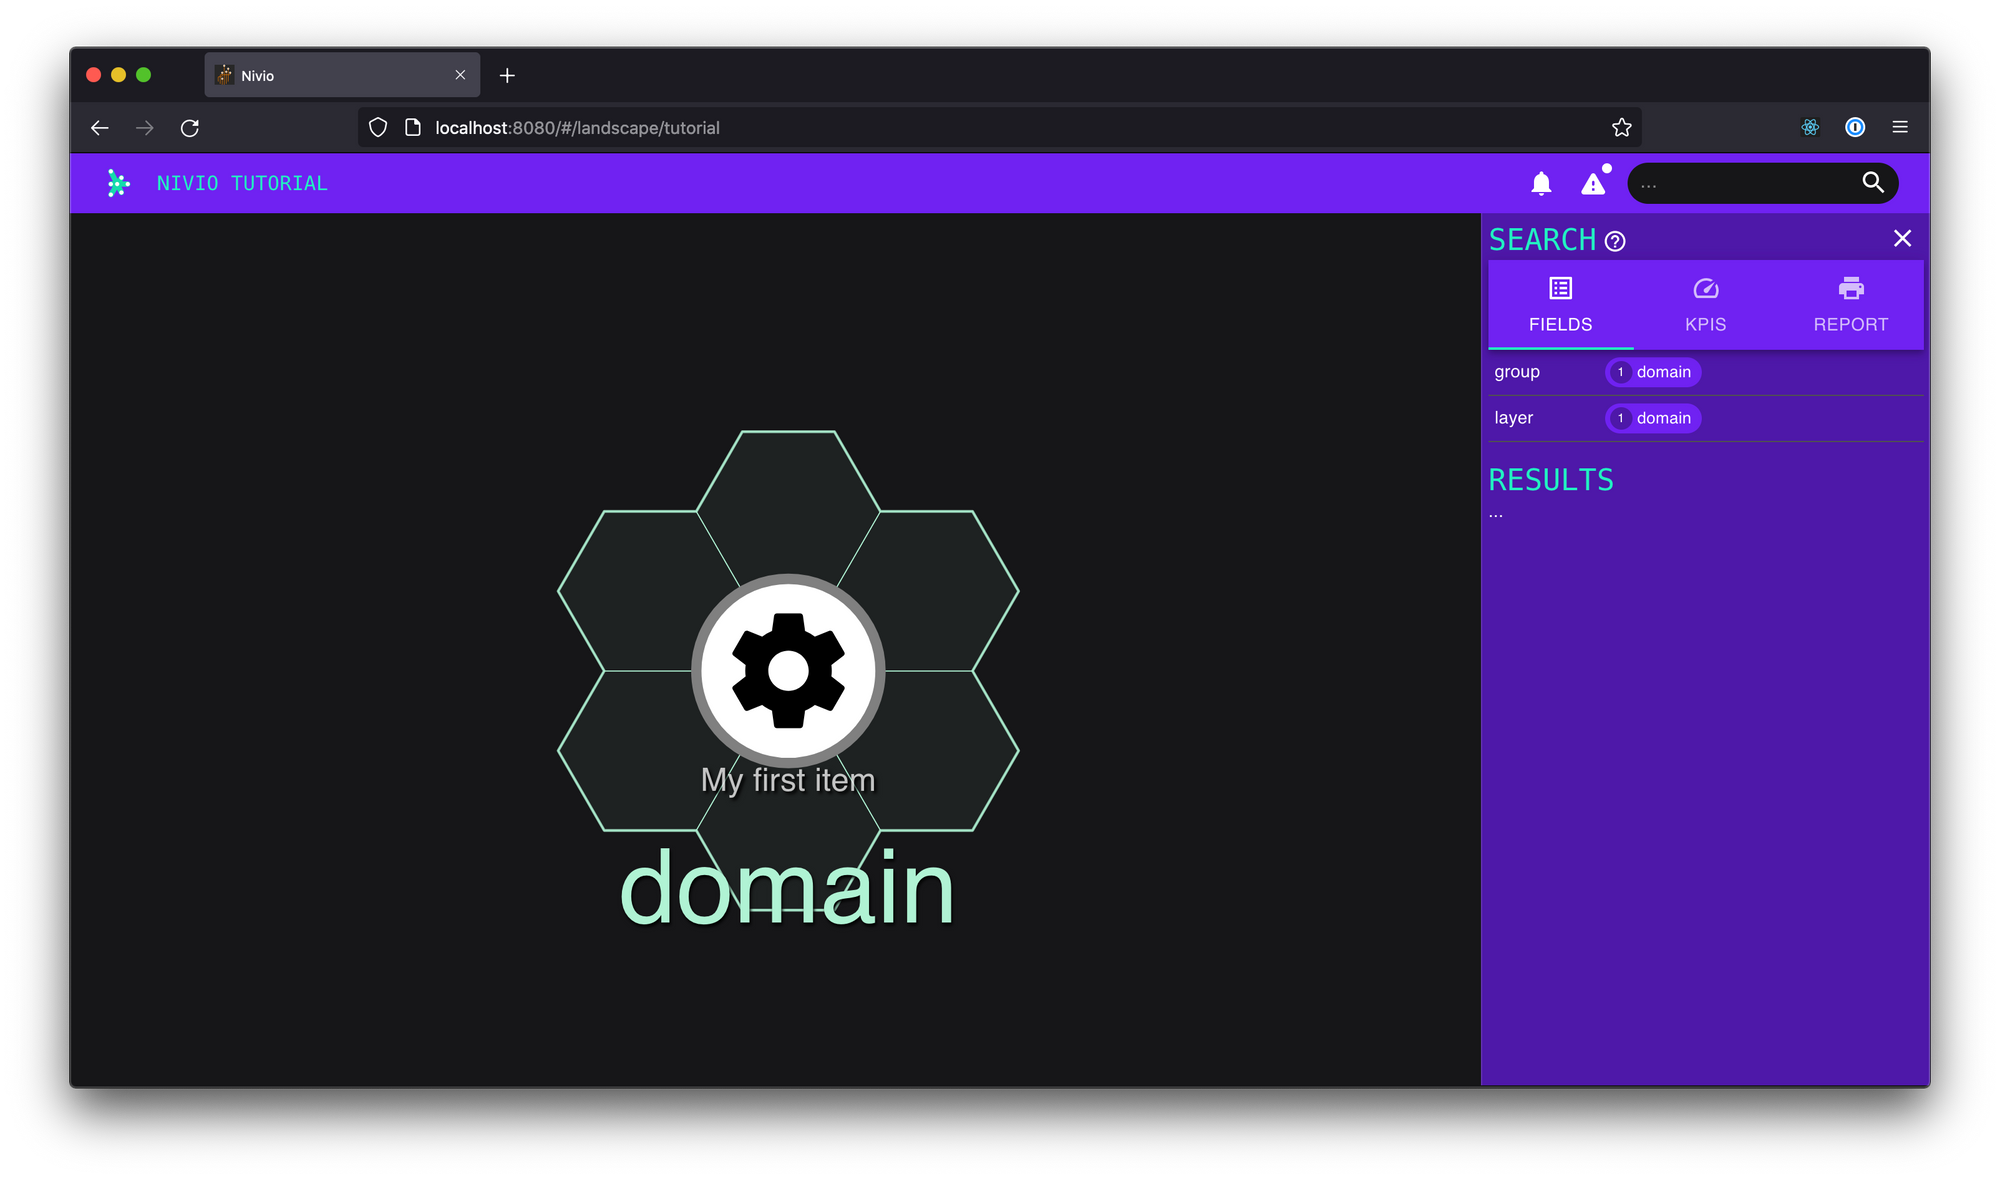
You should find your landscape with the item in it. The item might be assigned to a default group called domain.
The OpenAPI (aka Swagger) documentation is located at /v3/api-docs (JSON) or /swagger-ui.html (HTML GUI).
Updating the landscape
For example, simply change the name of the item and run the same curl command again.
The landscape diagram should update immediately in your browser.
As long as the landscape’s identifier is the same, it will be updated in place. If you change the landscape identifier in the YAML file, then Nivio will create a new, separate landscape.
curl -X PUT -H "Content-Type: application/yaml" --data-binary @tutorial.yaml ${NIVIO_BASE_URL}/api/landscape/tutorial
If the update doesn’t seem to be happening, make sure the curl request didn’t fail and you used PUT as method. If the reason is not obvious, you can also investigate in the Nivio logs.
For some changes, unfortunately though, you will have to restart Nivio and submit the landscape afresh.
Exploring the Nivio model
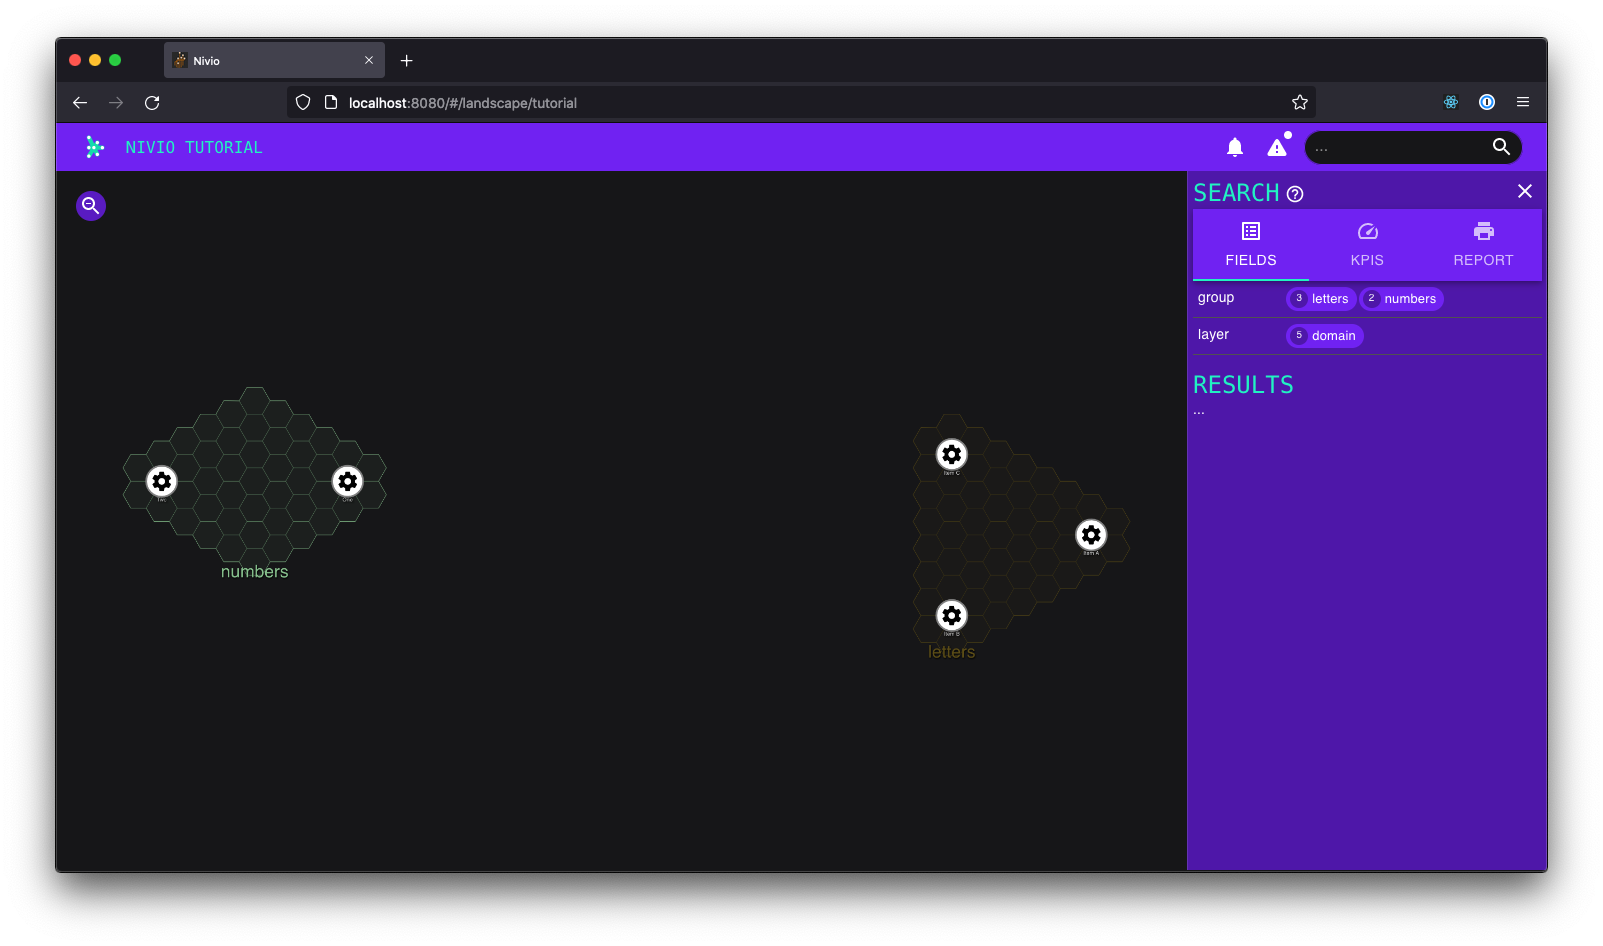
Adding your own groups
- Without groups, all items will be assigned to a default group. Items can be assigned to groups using the
groupattribute. - If a group does not exist, nivio creates it. To customize a group, add it to the configuration.
- However, you can’t create a group with no attributes. Nivio will not accept the landscape. So at least add an
owner. - If intended to delete already set group attributes such as
descriptionorcontact, you can do so. But please pay attention that this is not true for the attributes of items or of the landscape. The reason is that group attributes for the groups are all manually set, and the user should have full control about it. For items, instead, best practice is that attributes stick to the old values if they are missing in one configuration file. This is because items are mainly set by several config files. Also, landscapes are not intended to have missing attributes. Therefore, the landscape’s attributes stick to formerly set ones if they are missing.
1 2 3 4 5 6 7 8 9 10 11 12 | groups: letters: owner: Myself description: All the letters numbers: owner: Myself description: All the numbers items: - identifier: a name: Item A group: letters ... |
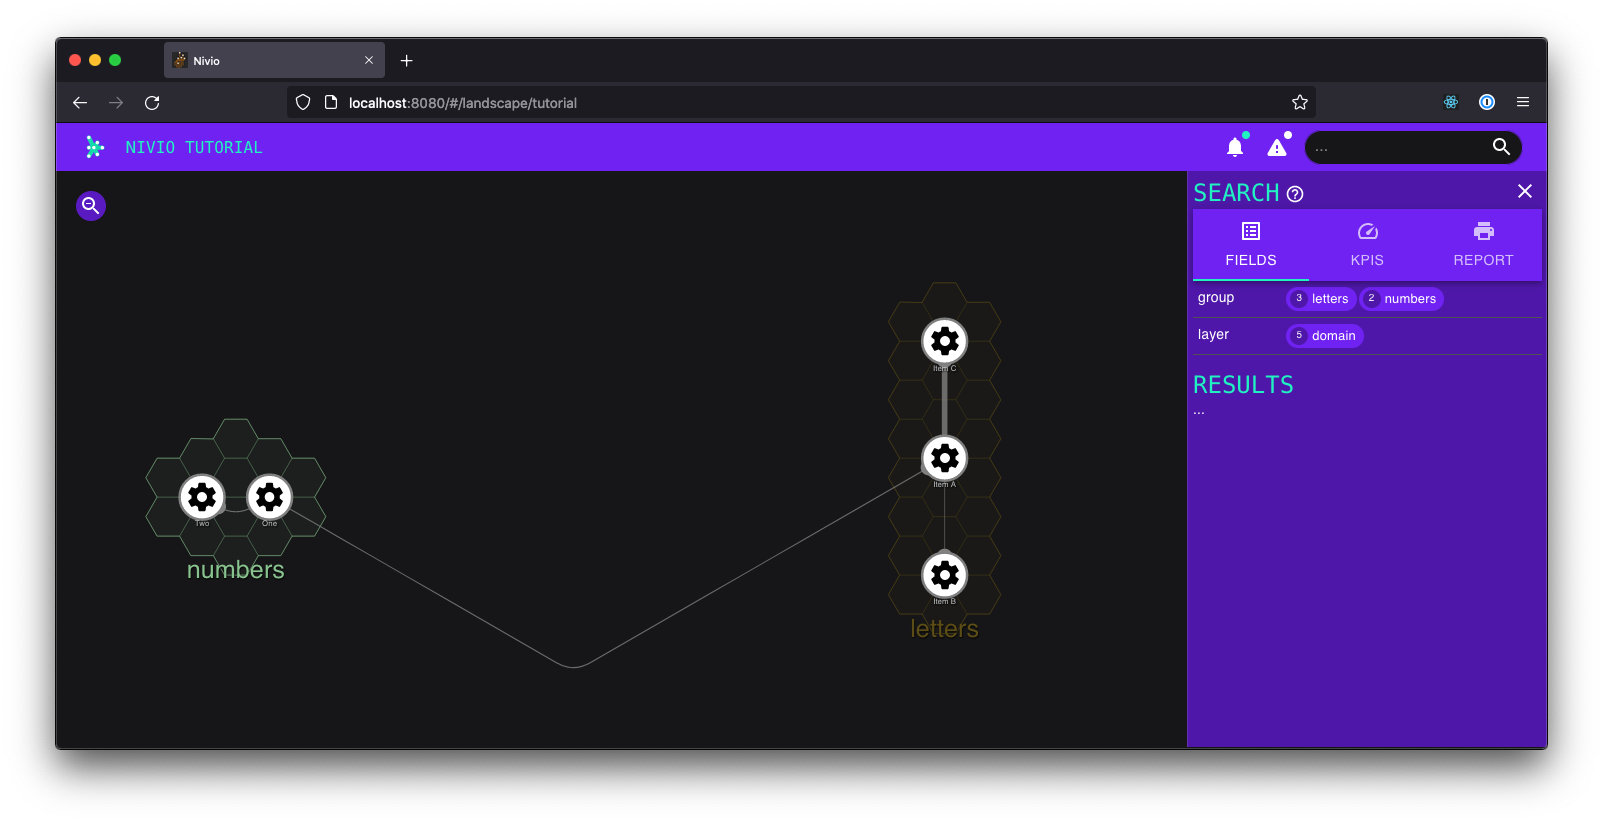
Adding relations between items
- Relations are a key element of every graph. Note that relations are directional in Nivio.
- A relation can have a weight attribute between 0-5 to control the width of the line between the two items.
Adding icons
1 2 3 4 5 6 7 8 9 10 11 12 | - identifier: a name: Item A group: letters icon: https://visioguy.github.io/IconSets/aws/icons/amazon_ec2.png - identifier: b name: Item B group: letters icon: https://visioguy.github.io/IconSets/aws/icons/amazon_dynamodb.png - identifier: c name: Item C group: letters icon: https://visioguy.github.io/IconSets/aws/icons/amazon_simple_queue_service_(sqs).png |
Observations
- We are not using them here, but don’t forget that Nivio supports all the [Material Design Icons](https://materialdesignicons.com/) out of the box!
- If you do use custom icons intensively, you should find a place for hosting them. You can define an environment variable
NIVIO_ICON_FOLDERwhich contains a path reachable for the app.
Introducing KPIs
Before you can set a KPI on an item, you need to define the KPI itself.
Here we create one called capacity. It requires a value of 90-100 in order to be considered healthy (green),
80-90 for semi-healthy (yellow), and everything else will be considered unhealthy (red):
1 2 3 4 5 6 7 8 | config: kpis: capacity: label: capacity ranges: GREEN: 90;100 YELLOW: 80;90 RED: 0;80 |
Now the KPI can be used simply by adding the corresponding attribute to any item:
1 2 3 4 | items: - identifier: a name: Item A capacity: 87 |
Observations
- The status of a KPI (i.e. its color) is automatically assessed based on the attribute value - awesome! 🏆
- There are two other colors that you could use, orange and brown.
- You only need to define a KPI once, then you can use the respective attribute on as many items as you need to. And of course, an item can use multiple KPIs.
- Nivio ships with a number of default KPIs (for more information see Data Assessment using KPIs section)
Summary
Conclusion
Once you have figured out its configuration language, Nivio is a great tool for quickly creating a cool visualization of your graph and of the dependencies between the entities you are managing, whether it’s software architecture, an application landscape, your organization, or any other domain. The addition of dynamic KPIs and the status aggregation make it really easy to spot issues quickly!
Best practices
- Use
groupsanditems. Userelationsbetween items. They also can have weights. - A group requires at least 1 attribute in order to work. Use
owner, because Nivio always shows something on the owner anyways, and “No owner” doesn’t look great. - The following attributes should be on every item: a
name, anicon, agroupassignment, KPI attributes for the info tab, and anyrandom wordwith avaluefor the details tab. This way, the item’s details will be nicely filled out across the info, relations (if applicable), and details tabs. - Define your own KPIs that make the most sense for your use case.
- Find a place to host your custom icons. Don’t abuse and don’t rely on external hosts!
- Make sure to read Using Templates to dynamically assign data before putting too much effort into item configuration.
Caveats
- The colors that are automatically assigned to groups tend to be dark and lack contrast, because they are also used for printing with white background. While you can assign colors manually, it’s very tedious to do so.
- You can experiment a lot with the structure of the landscape, but better figure out the attributes once and then stick to them. For example, icons, or color of groups, etc. - in order to see them updated everywhere (or at all!) you’ll often have to restart Nivio and submit the landscape again.
Bonus: Having Nivio pull your data
In order to have data automatically observed to changes Nivio expects a seed configuration at start time. You need to set the environment
variable SEED. The configuration file contains basic data, references to item descriptions sources, which can be local paths or URLs.
The descriptions can be gathered by HTTP, i.e. it is possible to fetch files from protected sources via authentication headers.
Think of GitLab or GitHub and the related tokens. To use secrets etc., please refer to Environment variables.
1 2 3 4 5 6 7 8 9 10 11 | identifier: nivio:example name: Landscape example contact: mail@acme.org description: This is an example landscape. sources: - "./items/wordpress.yml" - url: "http://some.server/docker-compose.yml" format: docker-compose-v2 - url: https://gitlab.com/bonndan/nivio-private-demo/raw/docker-compose.yml headerTokenName: PRIVATE_TOKEN headerTokenValue: ${MY_SECRET_TOKEN_ENV_VAR} |
Deleting items
Items not referenced anymore in the descriptions will be deleted automatically on a complete and successful re-index run. If an error occurs fetching the source while indexing, the behaviour of the indexer changes to treat the available data as partial input. This means only inserts and updates will happen and no deletion.
Environment variables
The following environment variables can be set to configure nivio:
-
DEMO
A non-empty value causes Nivio to start in demo mode with prepared data. Use the value ‘all’ to load more landscapes.
-
GITHUB_JWT
GitHub JSON Web Token (JWT) to connect to GitHub as a GitHub App.
-
GITHUB_LOGIN
GitHub user name. Can also be used to connect as organization with OAuth.
-
GITHUB_OAUTH
GitHUb OAuth Token to connect to GitHub via personal access token.
-
GITHUB_PASSWORD
GitHub password (for username/password login).
-
GITLAB_HOST_URL
The full URL to the GitLab API, e.g. http://your.gitlab.server.com/api/v4.
-
GITLAB_PASSWORD
GitLab OAuth login password (optional).
-
GITLAB_PERSONAL_ACCESS_TOKEN
Personal token to access the GitLab API at GITLAB_HOST_URL (optional).
-
GITLAB_USERNAME
GitLab OAuth login username (optional). If used, GITLAB_PASSWORD is also required).
-
KUBERNETES_MASTER
K8s master URL (optional). All variables from https://github.com/fabric8io/kubernetes-client#configuring-the-client can be used.
-
NIVIO_AUTH_ALLOWED_ORIGINS
Patterns for allowed origins when the app requires authentication
-
NIVIO_AUTH_GITHUB_ALIAS_ATTRIBUTE
GitHub user attribute to use as alias
-
NIVIO_AUTH_GITHUB_CLIENT_ID
GitHub app OAuth2 client id
-
NIVIO_AUTH_GITHUB_CLIENT_SECRET
GitHub app OAuth2 client secret
-
NIVIO_AUTH_GITHUB_NAME_ATTRIBUTE
GitHub user attribute to use as name
-
NIVIO_AUTH_LOGIN_MODE
Authentication mode: none, optional, required
-
NIVIO_BASE_URL
The base URL of Nivio to be used for frontends if running behind a proxy.
-
NIVIO_BRANDING_BACKGROUND
Branding background color (hexadecimal only).
-
NIVIO_BRANDING_FOREGROUND
Branding foreground color (hexadecimal only).
-
NIVIO_BRANDING_LOGO_URL
A URL pointing to a logo.
-
NIVIO_BRANDING_MESSAGE
A welcome message on the front page.
-
NIVIO_BRANDING_SECONDARY
Accent color used for active elements (hexadecimal only).
-
NIVIO_ICON_FOLDER
A folder containing icons named similar to material design icons
-
NIVIO_MAIL_HOST
SMTP mail host.
-
NIVIO_MAIL_PASSWORD
SMTP mail password.
-
NIVIO_MAIL_PORT
SMTP mail port.
-
NIVIO_MAIL_USERNAME
SMTP mail username.
-
PORT
The port Nivio runs on.
-
SEED
A semicolon-separated list of file paths containing landscape configurations.
-
SONAR_LOGIN
SonarQube login (username).
-
SONAR_PASSWORD
SonarQube password.
-
SONAR_PROXY_HOST
SonarQube proxy host (optional).
-
SONAR_PROXY_PORT
SonarQube proxy port (optional).
-
SONAR_SERVER_URL
SonarQube server URL.